

-
DeleteMe: Remove your personal info from public databases
-
Incogni: Best for Inexpensive Data Removal
Contents
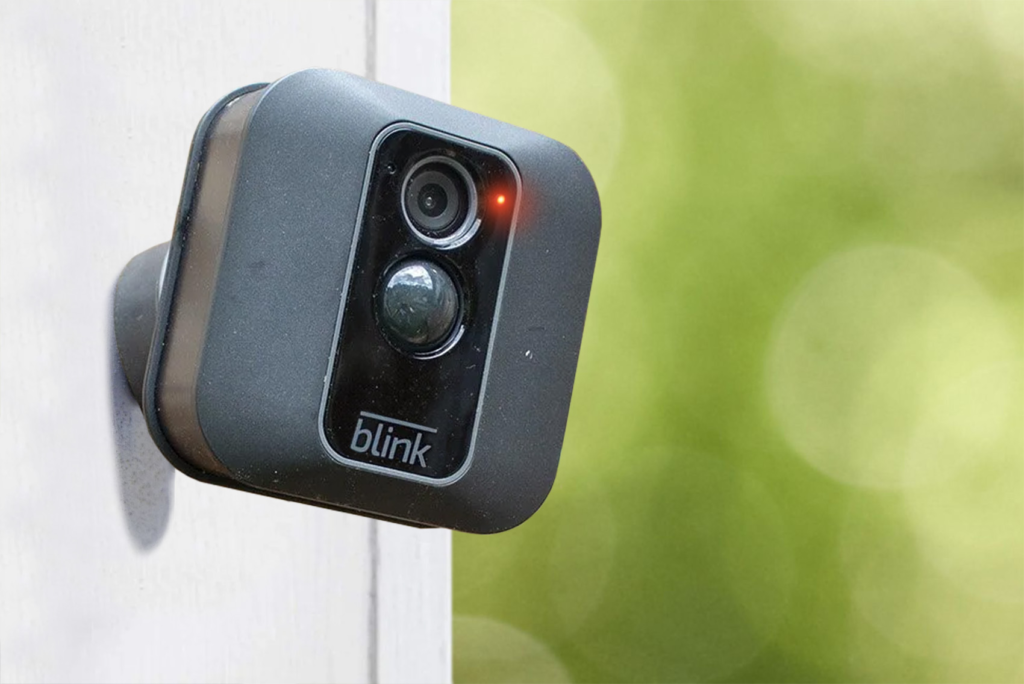
What is Camera Blinking?
Camera blinking refers to a situation where the camera on your device repeatedly flashes or blinks unexpectedly. This issue can occur on various devices, such as smartphones, tablets, or computers. Camera blinking can be frustrating and disruptive, making it difficult to capture photos or record videos.
In this article, we will explore the common causes of camera blinking and provide troubleshooting steps to help resolve the issue. Whether it’s a software glitch, hardware malfunction, or settings-related problem, understanding the root cause of camera blinking is essential for finding a solution and getting back to capturing those perfect shots. Let’s dive into the possible reasons behind camera blinking and how to fix them.
What Causes Camera Blinking?
Camera blinking on iPhones and other smartphones can be caused by a variety of factors. One possible cause is the use of the Macro Mode. When this mode is activated, the camera automatically adjusts its settings to focus on close-up subjects, which can result in intermittent blinking as it tries to find the optimal exposure.
Another potential cause is exposure issues, particularly in bright lighting conditions. In such situations, the camera may struggle to balance the light and provide a clear image, leading to blinking or flickering.
Physical damage can also impact the functionality of the camera and cause it to blink. If the camera lens or any internal components are damaged, it can affect its ability to capture stable images, resulting in blinking.
To troubleshoot camera blinking issues, users can try the following steps:
1. Check for software updates: Outdated software can lead to various glitches, including camera blinking. Update your device’s software to the latest version.
2. Restart your device: A simple restart can resolve many minor glitches, including camera blinking.
3. Reset camera settings: Go to the settings menu and reset the camera settings to their factory defaults.
If the camera blinking persists even after troubleshooting, it may indicate a hardware malfunction. In such cases, it is recommended to seek assistance from an authorized repair center or contact the manufacturer’s support for further assistance.
Troubleshooting Steps for Camera Blinking

Camera blinking or flickering can be a frustrating issue that many smartphone users experience. However, there are several steps you can take to troubleshoot and resolve this problem. First, it’s important to check for any software updates as outdated software can often lead to camera glitches. Restarting your device can also help resolve minor issues.
If the problem persists, resetting the camera settings to their factory defaults can be a useful troubleshooting step. Additionally, consider checking for physical damage such as a damaged lens or internal components, as this can also cause the camera to blink. By following these troubleshooting steps, you can identify and resolve the cause of your camera blinking issue, allowing you to capture clear and stable images once again.
Check the Device Settings
If your camera keeps blinking, one possible solution is to check your device settings. By adjusting the camera settings, you may be able to resolve the blinking issue.
Here’s how to do it:
1. Open the settings app on your device.
2. Look for the camera settings option. This may be located under the “System” or “Device” category.
3. Once you’ve found the camera settings, search for options related to flicker or frequency.
4. Adjust these settings accordingly to address the blinking problem. You may have the option to select a different frequency or disable the flicker reduction feature.
By making these adjustments in the device settings, you can potentially eliminate the camera blinking issue. Remember to save your changes after adjusting the settings. If the blinking persists, you may need to further troubleshoot the issue or seek assistance from a professional.
Checking the device settings is a quick and simple initial step to address camera blinking. Keep in mind that the location and terminology of the camera settings may vary depending on your device’s make and model.
Check for Software Updates
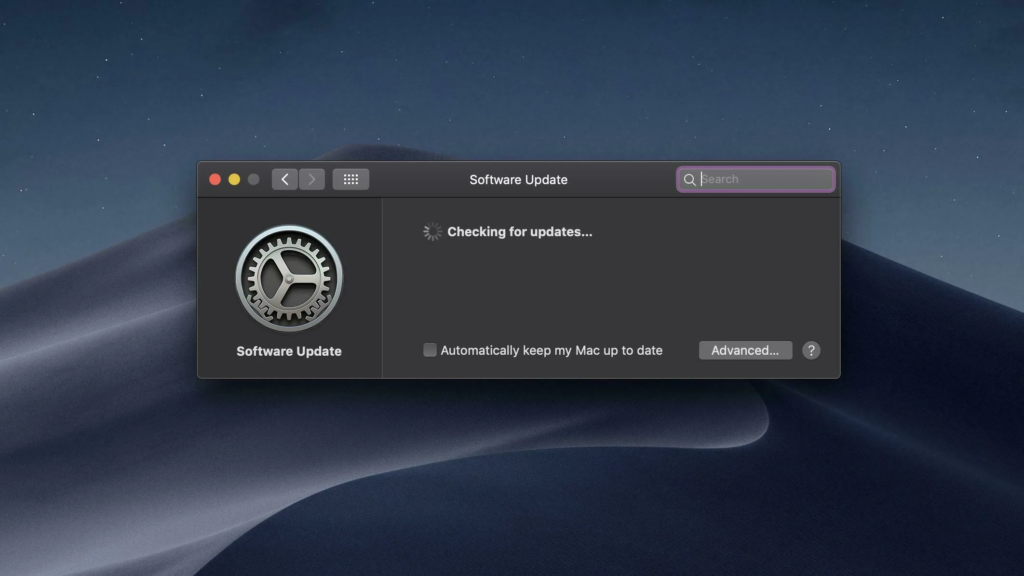
If your camera keeps blinking, one possible solution is to check for software updates on your device. Outdated software can sometimes cause issues with the camera’s functionality. Here’s how to check for software updates:
1. Open the Settings app on your device.
2. Scroll down and tap on “General.”
3. Look for the “Software Update” option and tap on it.
4. Your device will check for any available updates. If there are updates available, tap on “Download and Install” to start the update process.
Updating your device’s software can fix any bugs or glitches that may be causing the camera to blink. It’s important to keep your device’s software up to date to ensure optimal performance and compatibility. After installing the updates, check if the camera blinking issue persists. If it does, you may need to explore other troubleshooting steps or seek advice from an expert.
Reset the Camera to Default Settings
If your camera keeps blinking, one troubleshooting step you can take is to reset the camera to its default settings. This can help resolve any software glitches or settings conflicts that may be causing the issue.
To reset the camera settings on your device, follow these steps:
1. Open the Settings app on your device.
2. Navigate to the “Camera” option.
3. Look for the “Reset Camera Settings” option and tap on it.
4. Confirm your selection when prompted.
Keep in mind that resetting the camera settings will restore them to their default values. Any custom settings you have made will be wiped out, but this can often help fix the blinking problem.
If resetting the camera settings doesn’t resolve the issue, you can also consider resetting the entire device to its factory settings. This can be done by going to Settings > General > Reset All Settings. However, be aware that this will erase all your personal data and settings, so make sure to back up any important information before proceeding.
By resetting the camera to default settings or performing a full device reset, you can effectively troubleshoot and resolve blinking issues that may be affecting your camera’s performance.
Check Hardware Issues
If your camera keeps blinking on your iPhone, it could be due to hardware issues. Here are some steps you can take to check for these problems:
1. Inspect for physical damage: Examine your iPhone for any visible damage to the camera or lens. A broken lens or other physical damage can cause blinking visuals.
2. Ensure a secure connection: Check for a loose connection between the internal camera module and the rest of the device. Gently tap the back of your iPhone or lightly shake it to see if that affects the blinking.
If you notice any physical damage or a loose connection, it’s recommended to take your device to an authorized repair center or contact Apple Support for assistance. They can assess the issue and provide appropriate solutions.
Remember to consider these hardware-related possibilities if your camera keeps blinking. Resolving physical damage or fixing a loose connection may be necessary to eliminate the blinking issue on your iPhone’s camera.
Contact Apple Support
If you are experiencing camera blinking issues on your iPhone and need assistance, contacting Apple Support is a great solution. Here are the steps to get in touch with Apple’s support staff and address your camera problems effectively.
Firstly, visit Apple’s official support website. You can access it by typing “Apple Support” in your preferred search engine. On the support page, you will find various options to address your concern.
Next, explore the Communities section, where you can connect with other Apple users who may have faced similar camera blinking issues. This forum is an excellent resource for troubleshooting tips and solutions.
If you need specialized repairs for hardware challenges causing the camera blinking, it’s recommended to engage with Apple’s support staff directly. On the support page, you will find options to schedule a call, chat with a representative, or even visit an Apple store for tailored solutions.
By following these steps and reaching out to Apple Support, you can get the necessary help to fix your camera blinking problems and ensure a smooth photography experience.
Common Solutions for Camera Blinking Issues
If your camera keeps blinking, there are several common solutions that you can try to resolve the issue. These solutions range from software updates and troubleshooting steps to hardware checks and support from Apple. By following these suggestions, you can hopefully fix the blinking issue and get your camera back to working smoothly.
1. Software Updates: One of the first steps to take is to ensure that your device’s software is up to date. Software updates often include bug fixes and improvements that can address camera blinking issues.
2. Troubleshooting Steps: Start by exploring the Communities section on Apple’s support page. Here, you can find valuable tips and solutions from other users who may have faced similar camera blinking problems.
3. Hardware Checks: If the blinking persists, it could be due to a hardware issue. In this case, it is recommended to connect with Apple’s support staff for assistance. You can schedule a call, chat with a representative, or even visit an Apple store for tailored solutions.
By following these common solutions, you can troubleshoot and resolve camera blinking issues effectively. Remember to always keep your software updated and reach out to Apple’s support if needed for further assistance.
Use a Third-Party Camera App
If you are experiencing camera blinking issues on your iPhone, one possible solution is to try using a third-party camera app. These apps often have different features and settings that can help address the problem. Here’s how you can use a third-party camera app to resolve camera blinking issues:
1. Find and Install a Third-Party Camera App: Search for a reliable third-party camera app on the App Store. Look for apps that have positive reviews and a good track record. Once you find an app that suits your needs, download and install it on your iPhone.
2. Update the App: To ensure compatibility with your iPhone’s software, it’s essential to keep the third-party camera app updated. Launch the App Store, go to the “Updates” tab, and check if there are any updates available for the app. If there are, tap on the “Update” button next to the app’s name to install the latest version.
3. Use the Third-Party Camera App: Open the third-party camera app and test if the camera blinking issue persists. Explore the app’s settings and features to adjust exposure, lighting conditions, or other parameters that could be causing the blinking problem.
4. Switch Back to the Native Camera App: If the camera blinking issue still persists, you can switch back to the iPhone’s native camera app. Simply exit the third-party camera app and open the default camera app that comes pre-installed on your iPhone. Test the camera again to see if the issue is resolved.
Using a third-party camera app can sometimes help address camera blinking issues on your iPhone. Just make sure to update the app regularly and switch back to the native camera app if needed.
Check for Exposure Issues
If you’re experiencing blinking issues with your iPhone camera, it could be due to exposure problems. By manually adjusting the exposure settings in the Camera app, you can address any issues related to improper exposure. Here’s how you can check for exposure issues:
- 1. Open the Camera app on your iPhone.
- 2. Look for the upward-facing arrow icon at the top of the screen and tap on it. This will reveal additional camera controls.
- 3. Locate the circle icon with a plus and minus sign in the middle. Tap on it to access the exposure adjustment feature.
- 4. Use your finger to swipe left or right on the screen to increase or decrease the exposure levels, respectively.
- 5. Pay attention to the preview on the screen and make adjustments based on your surroundings. If you’re in a bright environment, you may want to decrease the exposure. Conversely, if you’re in a dark environment, increasing the exposure can help capture better images.
- 6. Test the camera again to see if the blinking issue is resolved.
By manually adjusting the exposure, you can effectively address exposure issues that may be causing your camera to blink. Experiment with different exposure levels in different lighting conditions to find the optimal settings for your photos.
Adjust Lighting Conditions
Adjusting the lighting conditions can help resolve camera blinking issues. Bright environments or dim lighting caused by certain light sources like LEDs or fluorescents can affect how the camera behaves.
When the environment is too bright, the camera’s automatic exposure feature may constantly adjust the exposure levels, leading to blinking. Similarly, in dimly lit situations, the camera may struggle to find the right exposure, causing it to blink as it continuously adjusts.
To address this, you can manually adjust the exposure in the camera settings. Open the camera app and look for the upward-facing arrow icon at the top of the screen. Tap on it to reveal additional camera controls. Look for the circle icon with a plus and minus sign and tap on it to access the exposure adjustment feature. Swipe left or right on the screen to increase or decrease the exposure levels based on your surroundings.
By fine-tuning the exposure settings, you can mitigate the camera blinking issue caused by varying lighting conditions. Experiment with different exposure levels to find the optimal setting for your specific environment.
It’s worth noting that camera blinking can also be caused by other factors such as software glitches or hardware malfunctions. If the issue persists even after adjusting the lighting conditions, it may be necessary to troubleshoot further or seek assistance from an authorized repair center.
Enable Macro Mode
To enable Macro Mode on your iPhone camera and capture stunning close-up photos, follow these simple steps:
- 1. Open the Camera app on your iPhone.
- 2. Look for the settings menu, usually represented by a gear or sliders icon, and tap on it.
- 3. Scroll through the settings menu until you find the option for Macro Mode. Tap on it to activate the feature.
- 4. Once Macro Mode is enabled, you can now focus on capturing close-up shots. When in the camera viewfinder, simply move the camera closer to your subject until it comes into focus. Macro Mode allows you to capture incredible details and textures, making it perfect for photographing flowers, insects, or any small objects.
- 5. Experiment with different compositions, angles, and lighting conditions to get the best results with Macro Mode.
- 6. Remember to disable Macro Mode when you’re done capturing close-up photos by going back to the settings menu and toggling off the Macro Control option.
With Macro Mode enabled on your iPhone camera, you’ll be able to take stunning close-up photos and showcase the intricate beauty of the world around you. Happy capturing!
Preventing Future Camera Blinking Issues
If you’ve been experiencing frequent camera blinking on your iPhone, it can be frustrating and may hinder your ability to capture moments. While there can be various reasons behind this issue, there are some steps you can take to prevent future camera blinking problems. First, ensure that you regularly update your device’s software. Software updates often include bug fixes and improvements that can address camera glitches.
Additionally, make sure to keep your iPhone’s hardware in good condition by avoiding physical damage and handling it carefully. If the blinking persists, consider resetting your device to its factory settings or seeking assistance from Apple support or a repair center. By following these steps, you can minimize the chances of facing camera blinking issues and continue to capture sharp and flawless photos with your iPhone’s built-in camera.
Regularly Update Your Software and Firmware
Regularly updating your software and firmware is crucial in preventing camera blinking issues. Software updates contain bug fixes and enhancements that can address any compatibility issues that may lead to camera blinking. Firmware updates, on the other hand, focus on the improvement of the camera’s internal components and performance.
For iPhone users, updating software is a simple process. Go to the Settings menu, tap on “General”, and select “Software Update”. If an update is available, download and install it on your device. By keeping your iPhone’s software up to date, you can ensure that any potential camera blinking issues are resolved and the camera functions smoothly.
Updating firmware on a camera follows a similar pattern. Visit the manufacturer’s website and look for the firmware update section specific to your camera model. Download the firmware update file and carefully follow the provided instructions to complete the installation. By regularly updating your camera’s firmware, you can optimize its performance and reduce the chances of camera blinking.
In conclusion, regularly updating both your software and firmware is essential for preventing camera blinking issues. By staying on top of these updates, you can ensure that your camera operates smoothly, captures stunning photos, and avoids any potential disruptions caused by outdated software or firmware.